Academia NativeApps Client Installation

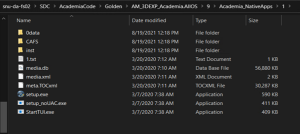
Step 1: Access the Client Software from Network Share

\\snu-da-fs02\SDC\AcademiaCode\Golden\AM_3DEXP_Academia.AllOS\9\Academia_NativeApps\1

Picture1.1715935999092.png


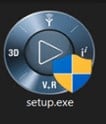
Step 2: Run the setup.exe

Picture2.1715936042148.jpg


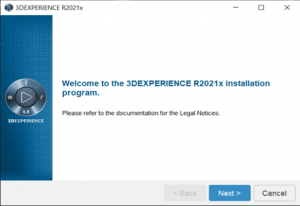
Step 3:  Click Next

Picture3.1715936098263.png


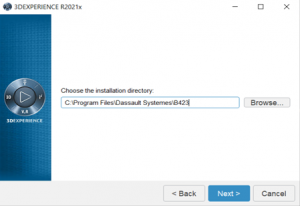
Step 4: Click Next

Picture4.1715936189342.png


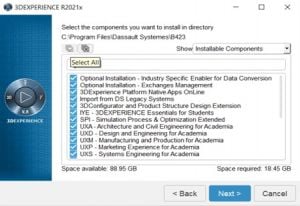
Step 5: Select All and Click Next

Picture5.1715936262368.jpg


(NOTE: Please check compare Space available and Space required)


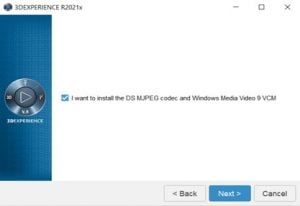
Step 6:  Click the check box and Next

Picture6.1715936529148.jpg


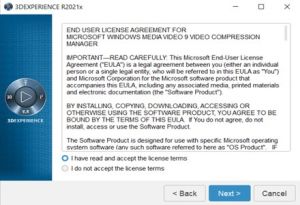
Step 7:  Select “I have read and accept the license terms” and click Next

Picture7.1715936570248.jpg


Step 8:  Click Next

Picture8.1715936634812.jpg


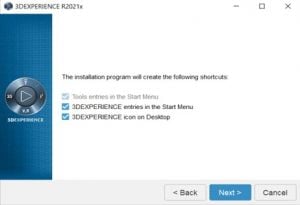
Step 9:  Click the check box and Next


Step 10:  Click Next

https://wiki.snu.edu.in/index.php?action=ajax&title=-&rs=SecureFileStore::getFile&f=/1/1a/3dexperiance_Picture10.png

Step 11: Click Install

https://wiki.snu.edu.in/index.php?action=ajax&title=-&rs=SecureFileStore::getFile&f=/0/08/3dexperiance_Picture11.png

Note: the installation may take time to complete based on compute resources available on Pc.

Step 12: Click on Close

https://wiki.snu.edu.in/index.php?action=ajax&title=-&rs=SecureFileStore::getFile&f=/6/6c/3dexperiance_Picture12.png

Installation of 3DEXP_NativeApps HotFix

Step 1: open the network path and click

\\snu-da-fs02\SDC\AcademiaCode\2124\Part_3DEXP_Academia.AllOS\8\3DEXP_NativeApps\HF_NativeApps_3DEXP.HF8.Windows64\1

https://wiki.snu.edu.in/index.php?action=ajax&title=-&rs=SecureFileStore::getFile&f=/f/f1/3dexperiance_Picture13.png

Step 2: Run the setup.exe

https://wiki.snu.edu.in/index.php?action=ajax&title=-&rs=SecureFileStore::getFile&f=/d/dd/3dexperiance_Picture14.png

Step 3: Next

https://wiki.snu.edu.in/index.php?action=ajax&title=-&rs=SecureFileStore::getFile&f=/a/aa/3dexperiance_Picture15.png

Step 4: Next

https://wiki.snu.edu.in/index.php?action=ajax&title=-&rs=SecureFileStore::getFile&f=/6/68/3dexperiance_Picture16.png

Step 5: Click on Install

https://wiki.snu.edu.in/index.php?action=ajax&title=-&rs=SecureFileStore::getFile&f=/9/93/3dexperiance_Picture17.png

Step 6: Close

https://wiki.snu.edu.in/index.php?action=ajax&title=-&rs=SecureFileStore::getFile&f=/c/c8/3dexperiance_Picture18.png

Step 7: Go to folder location and create folder by the name of “Licenses

C:\ProgramData\DassaultSystemes

https://wiki.snu.edu.in/index.php?action=ajax&title=-&rs=SecureFileStore::getFile&f=/8/80/3dexperiance_Picture19.png

Step 8: Go to C:\ProgramData\DassaultSystemes\Licenses and create a new text file by the name as “DSLicSrv.txt” open the file and add the license information as below:

https://wiki.snu.edu.in/index.php?action=ajax&title=-&rs=SecureFileStore::getFile&f=/2/28/3dexperiance_Picture20.png

SNU-SDC-LIC01.SNU.IN:4085 and save the file.

https://wiki.snu.edu.in/index.php?action=ajax&title=-&rs=SecureFileStore::getFile&f=/1/12/3dexperiance_Picture21.png

Step 9: create connection profile -> Click on + button

https://wiki.snu.edu.in/index.php?action=ajax&title=-&rs=SecureFileStore::getFile&f=/1/1c/3dexperiance_Picture22.png

Platform Name: 3DExperience (any name)

Platform Type: 3DEXPERIENCE

https://wiki.snu.edu.in/index.php?action=ajax&title=-&rs=SecureFileStore::getFile&f=/f/f9/3dexperiance_Picture23.png

Protocol: https

Host Name: 3dexperience.snu.edu.in

Port: 443

ROOT URI: 3dspace

https://wiki.snu.edu.in/index.php?action=ajax&title=-&rs=SecureFileStore::getFile&f=/7/78/3dexperiance_Picture24.png

Step 10: Finish

No categories assignedEdit