Vinay Muskan (talk | contribs) |
Vinay Muskan (talk | contribs) |
||
| (2 intermediate revisions by the same user not shown) | |||
| Line 5: | Line 5: | ||
[[File:Picture1.1718001179570.png|frameless]] | [[File:Picture1.1718001179570.png|frameless]] | ||
| − | |||
| − | |||
| − | |||
| − | |||
| Line 49: | Line 45: | ||
[[File:Picture6.1718002046481.png|frameless]] | [[File:Picture6.1718002046481.png|frameless]] | ||
| − | |||
| − | |||
| − | |||
| − | |||
| Line 69: | Line 61: | ||
[[File:2.2.1718002254509.png|frameless]] | [[File:2.2.1718002254509.png|frameless]] | ||
| − | |||
| − | |||
| − | |||
| − | |||
| Line 86: | Line 74: | ||
[[File:2.4.1718002324719.png|frameless]] | [[File:2.4.1718002324719.png|frameless]] | ||
| + | |||
5. Enter your '''SNU Net ID''' (Ex: <span style="text-decoration: underline;">'''snu\snunetid'''</span>) and '''Password''' and click on '''"Login"''' | 5. Enter your '''SNU Net ID''' (Ex: <span style="text-decoration: underline;">'''snu\snunetid'''</span>) and '''Password''' and click on '''"Login"''' | ||
| Line 131: | Line 120: | ||
| − | <div style="padding-left: 210px;">'''<code>''chmod u+x vdiclient_linux''</code>'''</div> | + | <div style="padding-left: 210px;">'''<code>''chmod u+x vdiclient_linux''</code>'''</div>[[File:1.3.1718174608808.png|frameless|584x584px]] |
| − | [[File: | + | |
4. Run the file using the following command: | 4. Run the file using the following command: | ||
| Line 138: | Line 127: | ||
| − | <div style="padding-left: 210px;">'''<code>sudo ./vdiclient_linux</code>'''</div> | + | <div style="padding-left: 210px;">'''<code>sudo ./vdiclient_linux</code>'''</div>[[File:1.4.1718174650928.png|frameless|587x587px]] |
| − | [[File: | + | |
5. Enter your password for sudo access. | 5. Enter your password for sudo access. | ||
| − | [[File: | + | [[File:1.5.1718174706578.png|frameless|593x593px]] |
6. The installer will launch after the extraction is complete. | 6. The installer will launch after the extraction is complete. | ||
| − | [[File: | + | [[File:1.6.1718174744258.png|frameless|556x556px]] |
| + | |||
| + | |||
| + | |||
| + | |||
7. Click on '''"I Accept the terms in the license agreement"''' and click on '''Next''' | 7. Click on '''"I Accept the terms in the license agreement"''' and click on '''Next''' | ||
| − | |||
| − | |||
8. Select all the listed components and click on Next | 8. Select all the listed components and click on Next | ||
| − | [[File: | + | [[File:1.8.1718184417898.png|frameless|446x446px]] |
9. Click on '''Install''' | 9. Click on '''Install''' | ||
| − | [[File: | + | [[File:1.9.1718184472704.png|frameless|428x428px]] |
10. Wait for the installer to finish | 10. Wait for the installer to finish | ||
| − | [[File: | + | [[File:1.10.1718184519533.png|frameless|410x410px]] |
| + | |||
11. Check the '''"Register and start installed service(s) after the installation"''' checkbox and click on '''Scan''' | 11. Check the '''"Register and start installed service(s) after the installation"''' checkbox and click on '''Scan''' | ||
| − | [[File: | + | [[File:1.11.1718184570183.png|frameless|422x422px]] |
| + | |||
| + | |||
12. The installer will scan for dependencies and give a report. Click on '''Close''' | 12. The installer will scan for dependencies and give a report. Click on '''Close''' | ||
| − | [[File: | + | [[File:1.12.1718184614781.png|frameless|407x407px]] |
===Step 2: Launching Application=== | ===Step 2: Launching Application=== | ||
Revision as of 09:37, 12 June 2024
Setup Guide for VDI Client Setup
Download and Install the client for VMware Horizon (Windows OS)
Step 1: Downloading and Installing
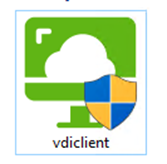
1. Download the client from the url: http://helpdesk.webapps.snu.edu.in/vdiclient.exe
2. Run the downloaded setup to install the client
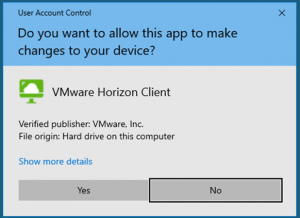
3. Click on "Yes" on the UAC prompt to allow the setup to continue
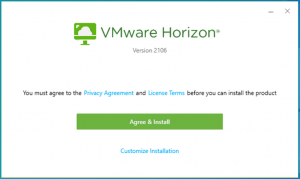
4. Click on "Agree & Install"
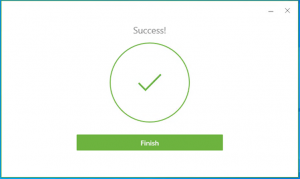
5. Click on "Finish" once the installation is completed.
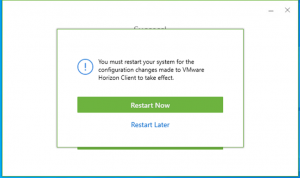
6. Click on "Restart Now" or optionally, you may choose to "Restart Later"
Step 2: Launching Application
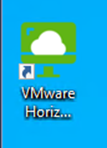
1. Launch the application from the desktop icon created by the setup.
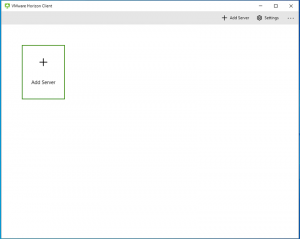
2. Click on Add Server (please note: this is only to be done once).
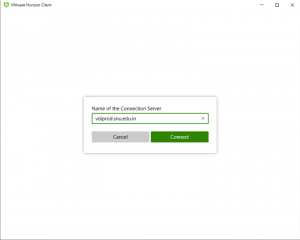
3. Enter "vdiprod.snu.edu.in" as the name of the Connection Server and click on "Connect"
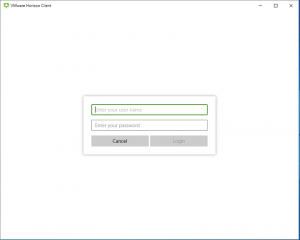
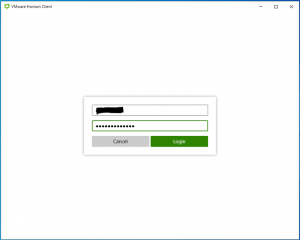
4. You will be prompted to enter your Username and Password
5. Enter your SNU Net ID (Ex: snu\snunetid) and Password and click on "Login"
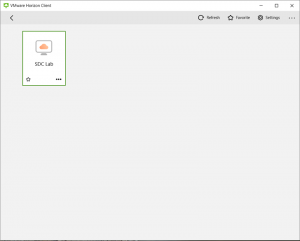
6. Your assigned Virtual Desktop(s) will be presented to you on the screen.
Step 3: Accessing your Virtual Desktop
1. Double left click on the desired Virtual Desktop you want to access.
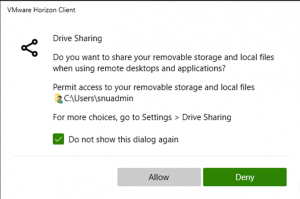
2. You may choose to Allow your local drive sharing, if you want to share your local pc drive, click on "Allow" else click on "Deny"
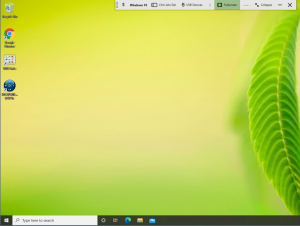
3. Your Virtual Desktop is presented to you, you may work on it like you would normally.
4. To Disconnect from the Virtual Desktop, click on the Three Dots icon in the title bar of the horizon client and then click on "Logoff Desktop"
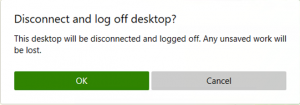
5. Click on "OK" on the confirmation screen to Logoff your desktop
Download and Install the client for VMware Horizon (Ubuntu/Linux OS)
Step 1: Downloading and Installing
1. Download the client from the url: http://helpdesk.webapps.snu.edu.in/vdiclient_linux.tar.gz
2. Open a Terminal and change directory to the location of the downloaded file. Extract the archive using the command:
tar -xvf vdiclient_linux.tar.gz3. Change the permission on the file you downloaded to allow it to execute using the following command:
chmod u+x vdiclient_linux
4. Run the file using the following command:
sudo ./vdiclient_linux
5. Enter your password for sudo access.
6. The installer will launch after the extraction is complete.
7. Click on "I Accept the terms in the license agreement" and click on Next
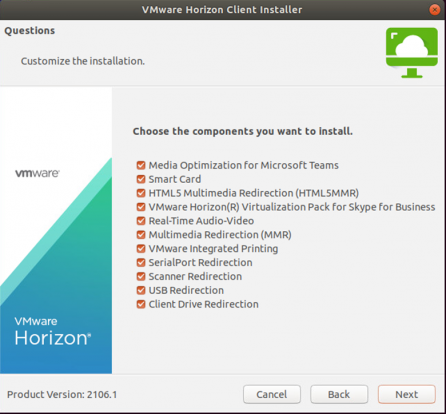
8. Select all the listed components and click on Next
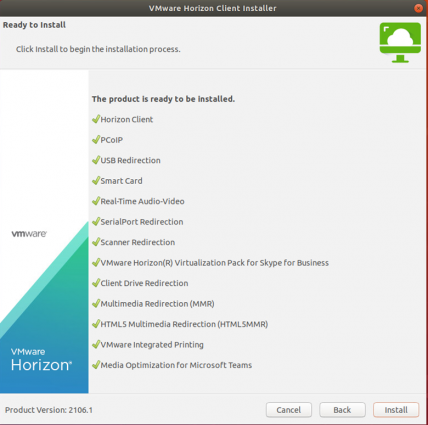
9. Click on Install
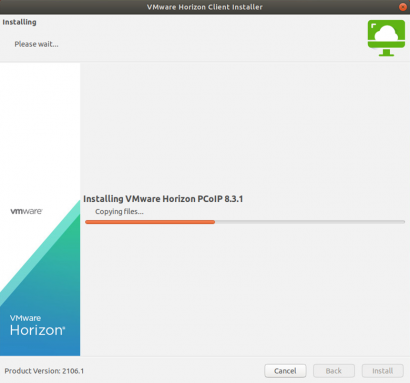
10. Wait for the installer to finish
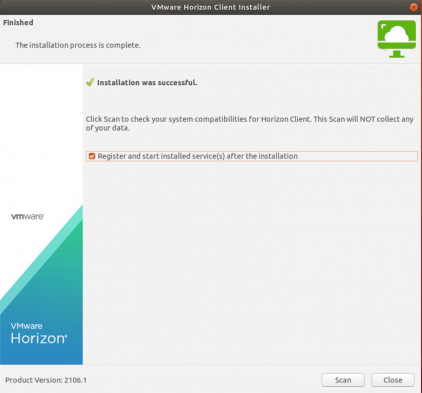
11. Check the "Register and start installed service(s) after the installation" checkbox and click on Scan
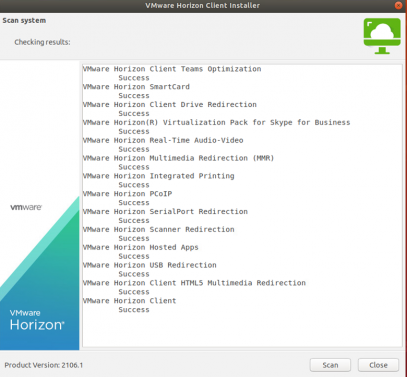
12. The installer will scan for dependencies and give a report. Click on Close
Step 2: Launching Application
1. Launch the application from the application menu by clicking on the "VMware Horizon" icon created by the setup.
2. Click on Add Server (please note: this is only to be done once).
3. Enter "vdiprod.snu.edu.in" as the name of the Connection Server and click on "Connect"
4. You will be prompted to enter your Username and Password
5. Enter your SNU Net ID (Ex: snu\snunetid) and Password and click on "Login"
6. Your assigned Virtual Desktop(s) will be presented to you on the screen.
Step 3: Accessing your Virtual Desktop
1. Double left click on the desired Virtual Desktop you want to access.
2. Your Virtual Desktop is presented to you, you may work on it like you would normally.
3. To Disconnect from the Virtual Desktop, click on the Connection icon in the title bar of the horizon client and then click on "Disconnect and Log off"
5. Click on "Log Off" on the confirmation screen to Logoff your desktop
6. Click on "Disconnect from Server Icon" to disconnect from the server.
7. Click on "Disconnect" to disconnect from the server.
8. You can close the client now.
Download and Install the client for VMware Horizon (MAC OS)
Step 1: Downloading, Installing and connecting to the Virtual Desktop
1. Download the client from the url: http://helpdesk.webapps.snu.edu.in/vdiclient_mac.dmg
2. Click on the downloaded file to open it and then click on "Agree"
3. Drag the VMware Horizon Client installer to the Applications Folder to Install the client software.
4. Wait for the copy operation to finish.
5. Click on "Open" to launch the installer.
6. Click on "Continue"
7. Enter your MAC OS User Name and Password to allow the VMware Horizon Client to make changes.
8. Enter vdiprod.snu.edu.in as the connection server name. Tick the "Always connect at launch" checkbox. Click on Connect
9. Enter your SNU Net ID (Ex: snu\snunetid) and Password and click on "Login"
10. Your entitled Desktops will be presented to you. Click on the desired desktop and wait for it to load.
11. Click on Allow to enable sharing of local storage with the Virtual Desktop.
12. You may use the Desktop like a normal Windows PC.
13. When finished working, you may logout and close the application.
Kindly note:
- You can only access one desktop at a given time.
- If you do not logoff your desktop and simply disconnect or close the application, the system will initiate a logoff after 5 mins.
- You may go through the Do's and Don't for using the VDI platform at:
